
Parr 1661 Calorimetry Thermometer
Author: J. M. McCormick
Last Update: September 10, 2013
The Parr 1661 calorimetry thermometer (shown in Fig. 1) is interfaced to a computer using the Vernier LabPro interface equipped with an INA-BTA instrumentation amplifier (click here to review operation of the LabPro and the LoggerPro software that controls it). The computer should automatically recognize the LabPro interface, but it may not find the instrumentation amplifier, in which case you will need to manually configure the interface (done via the LoggerPro menu bar: Experiment, Set Up Sensors).
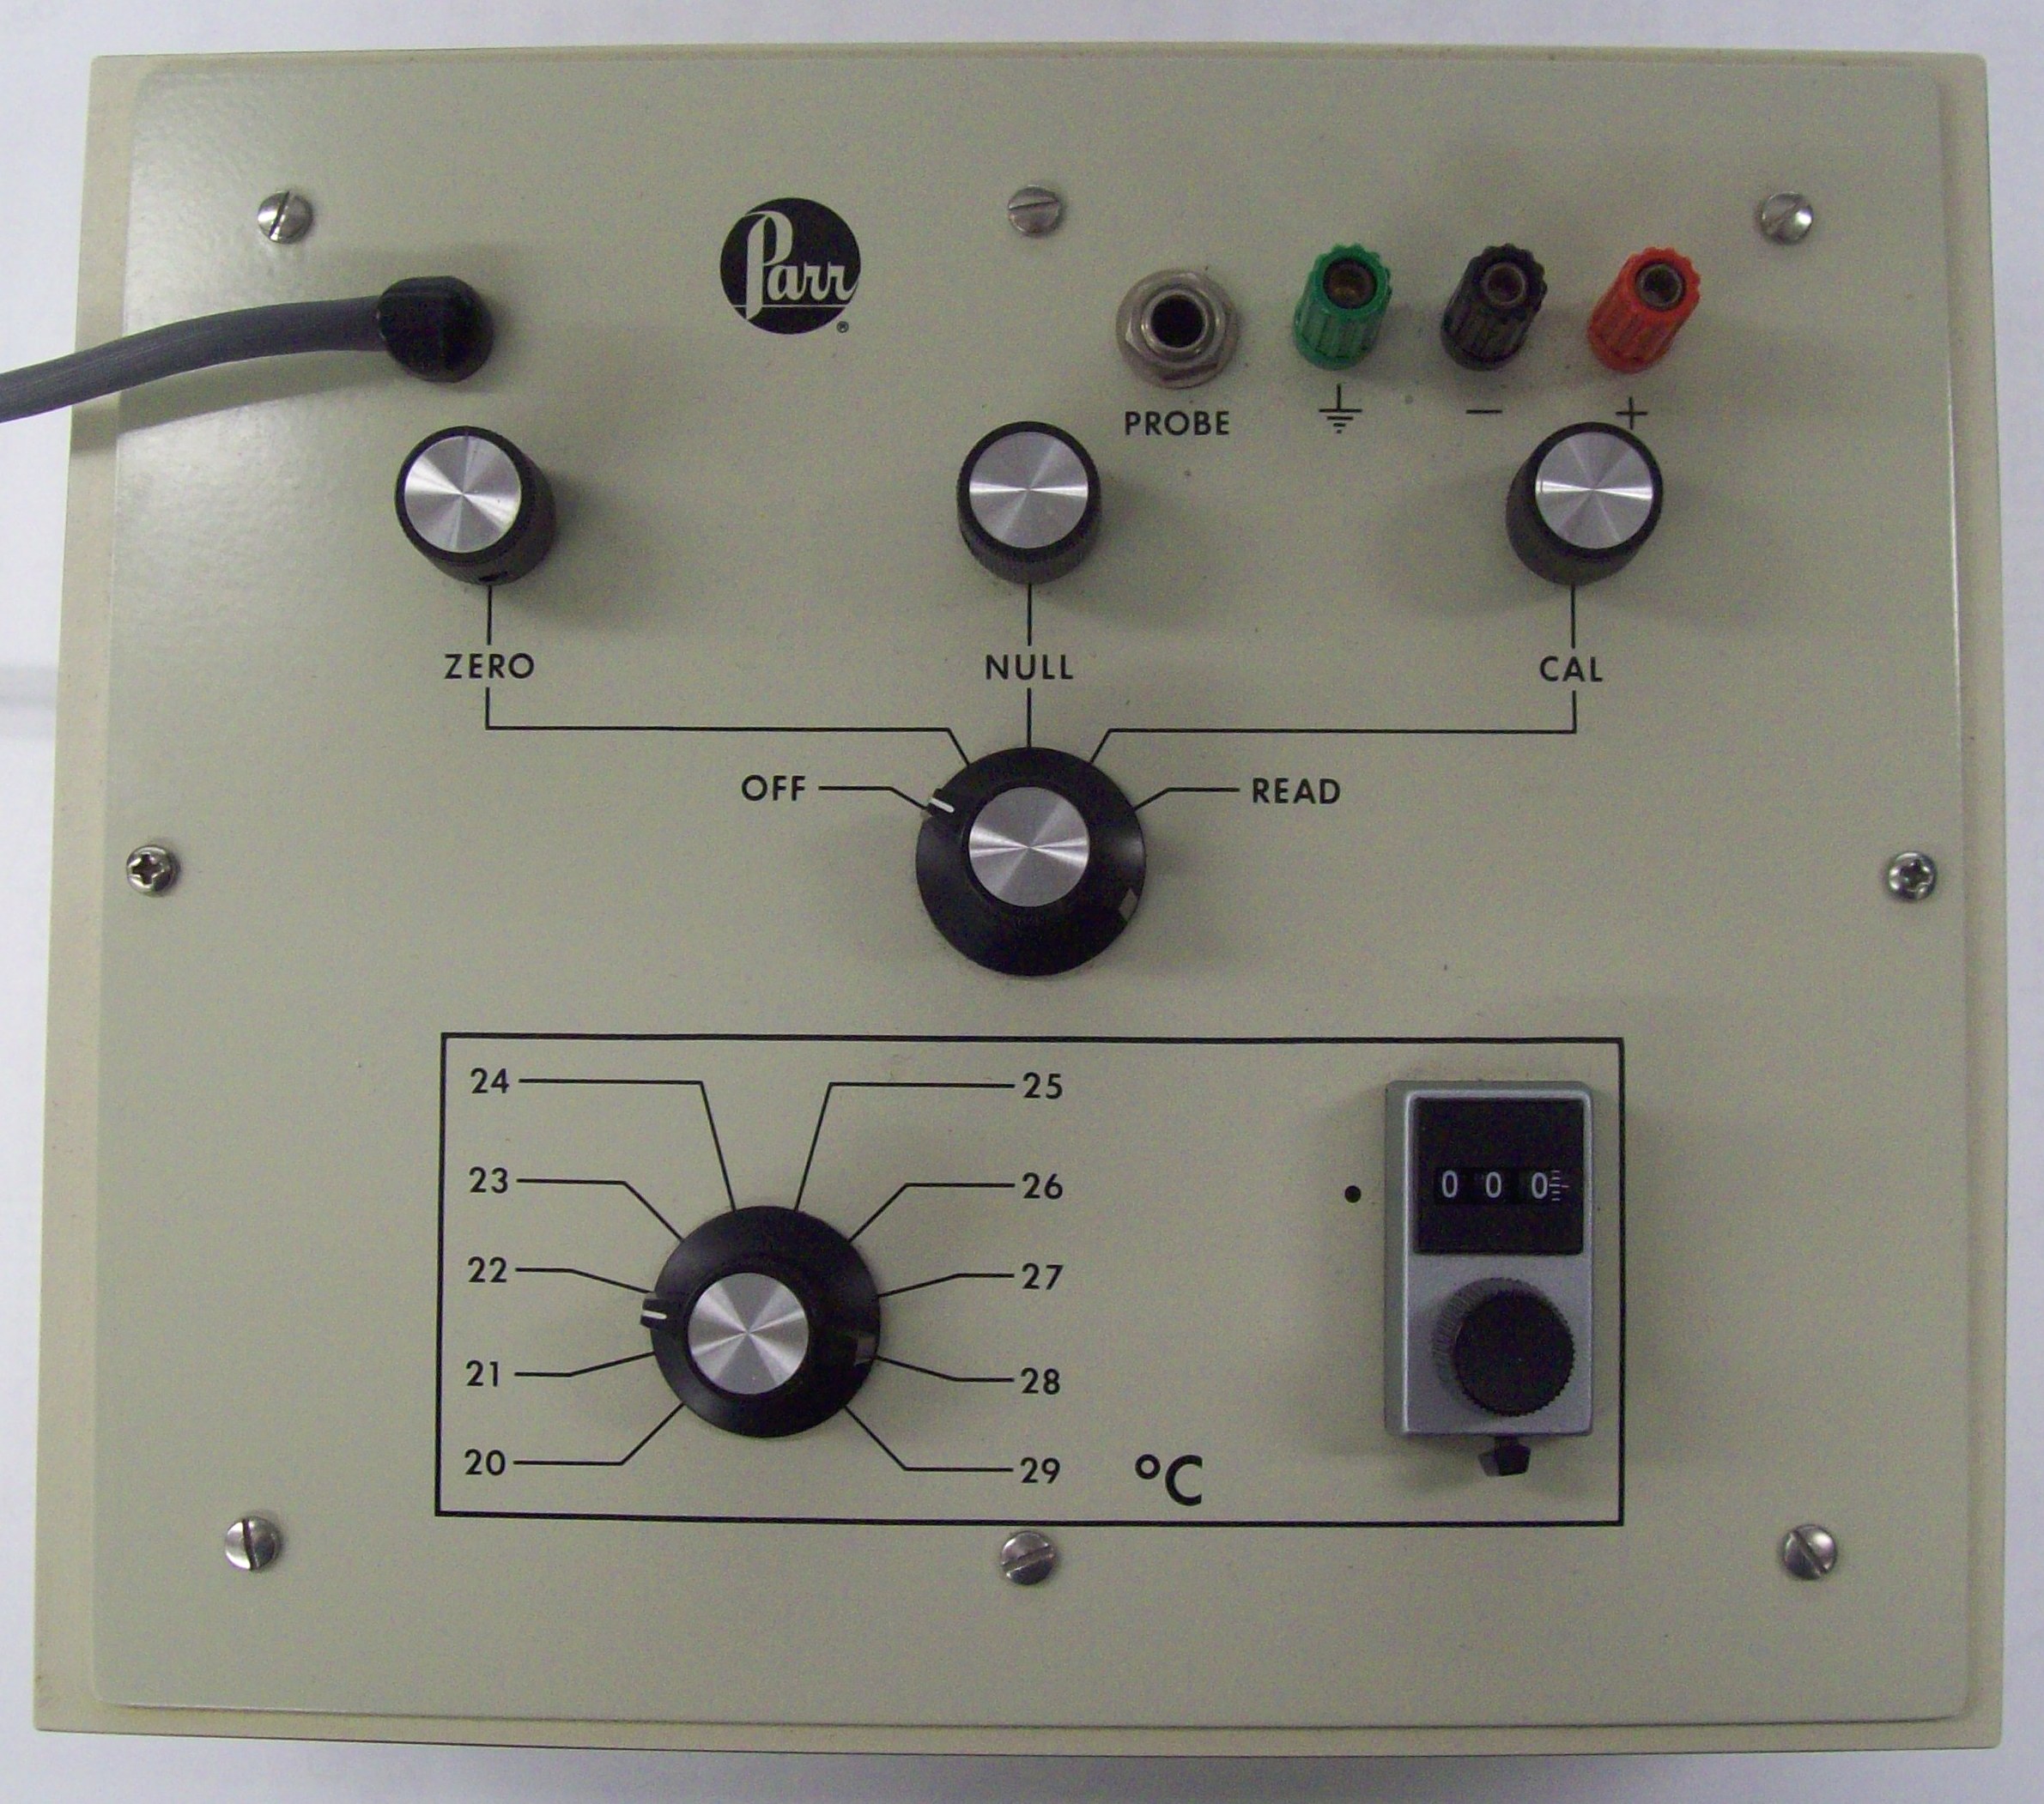
Figure 1. The Parr model 1661 calorimetry thermometer.
Insert the temperature probe plug into the receptacle on the top of the thermometer box labeled PROBE. Make sure that it is fully seated, otherwise you will not gather any meaningful data. Connect the instrumentation amplifier to the thermometer using the red and black cables (red terminals with the red wire and black terminals with the black wire). The banana plug on each cable is inserted into the terminal on the amplifier, while the alligator clips are used to attach the wire to the terminals on the thermometer. Be sure that the clips do not touch! Set the instrumentation amplifier to the 0-1 V setting. Note that it takes at least 10-15 minutes for the calorimetry thermometer to warm up and give stable readings.
As the calorimetry thermometer warms up, set the control knob to ZERO and place the probes of a digital voltmeter (DVM) in the thermometer’s terminals. Set the DVM to read DC voltage. Monitor the readings as the thermometer warms up. Although there may be some drift, the readings should stabilize in ten minutes, or so. Note that you should leave the digital potentiometer (lower right side of the thermometer) set to 000 at all times, as shown in Fig. 1. Once the thermometer has warmed up, turn the ZERO potentiostat until the DVM reads 0.000 V. Turn the control knob to NULL and use the NULL potentiostat to set the DVM reading to 0.000 V. Now turn the control knob to CAL and turn its potentiostat until the DVM reading is 1.000 V. Repeat this procedure until the voltage readings are stable as you turn the control knob to the different settings. When the thermometer has stabilized, you can now calibrate the instrumentation amplifier.
Start the calibration routine in LoggerPro, and select Calibrate Now in the calibration window. With the control knob set to ZERO (the DVM reads 0.000 V, adjust if necessary) enter 0 under the first calibration point in the calibration window and selectKeep. Now set the control knob to CAL (DVM reads 1.000 V, adjust if needed) and enter 1000 in the second calibration point. Select Keep and close the calibration window by clicking Done. LoggerPro should know display the voltage, which should be very close to the DVM’s. If it is not, you can repeat the calibration procedure until it is. If the voltages are offset, and you can not correct for it, simply note the offset for use later, if needed. You should also note the variation of the voltage with time as this will be related to how precisely you can measure the temperature.
Set the temperature range knob (lower left side of the thermometer) to the temperature in the room to the nearest, lower degree. For example, if room temperature is 23.5 °C, you would set the temperature range knob of 23. Note that once you have set the temperature range knob for a run, do not change it! Move the control knob to READ. LoggerPro (and the DVM) will now read a voltage that is related to the temperature. To convert between mV and °C, use the formula
| (reading in mV)/100 + (temperature range setting) = temperature in °C |
For example, if the temperature range knob is set for 22 and the voltage is 115.5 mV, the temperature is 23.155 °C. You can double check your calibration at this point by reading the temperature with a mercury calorimetry thermometer. Remember that you can create a calculated column in LoggerPro so that this conversion is automatically done as the data is obtained.
Once the thermometer has been calibrated, you can remove and shut off the DVM. However, you will want to check the calibration of the thermometer before each run and correct for any drift. When the thermometer is not in use the control knob should be set for ZERO, NULL, or CAL; it should not be left on READ.