
Parr Solution Calorimeters
Author: J. M. McCormick
Last Update: September 29, 2009
Background
There are two Parr solution calorimeters available for conducting solution thermochemistry experiments. The model 1451 solution calorimeter is shown in Fig. 1a (left). Integrated into the body of the calorimeter is a Parr 1661 calorimetry thermometer, but this is not functional on our instrument. The model 6755 solution calorimeter is shown in Fig. 1b (right). This instrument does not have a built-in calorimetry thermometer and thus requires an external calorimetry thermometer. For both of our solution calorimeters, a Parr 6772 calorimetry thermometer is used to record the temperature.
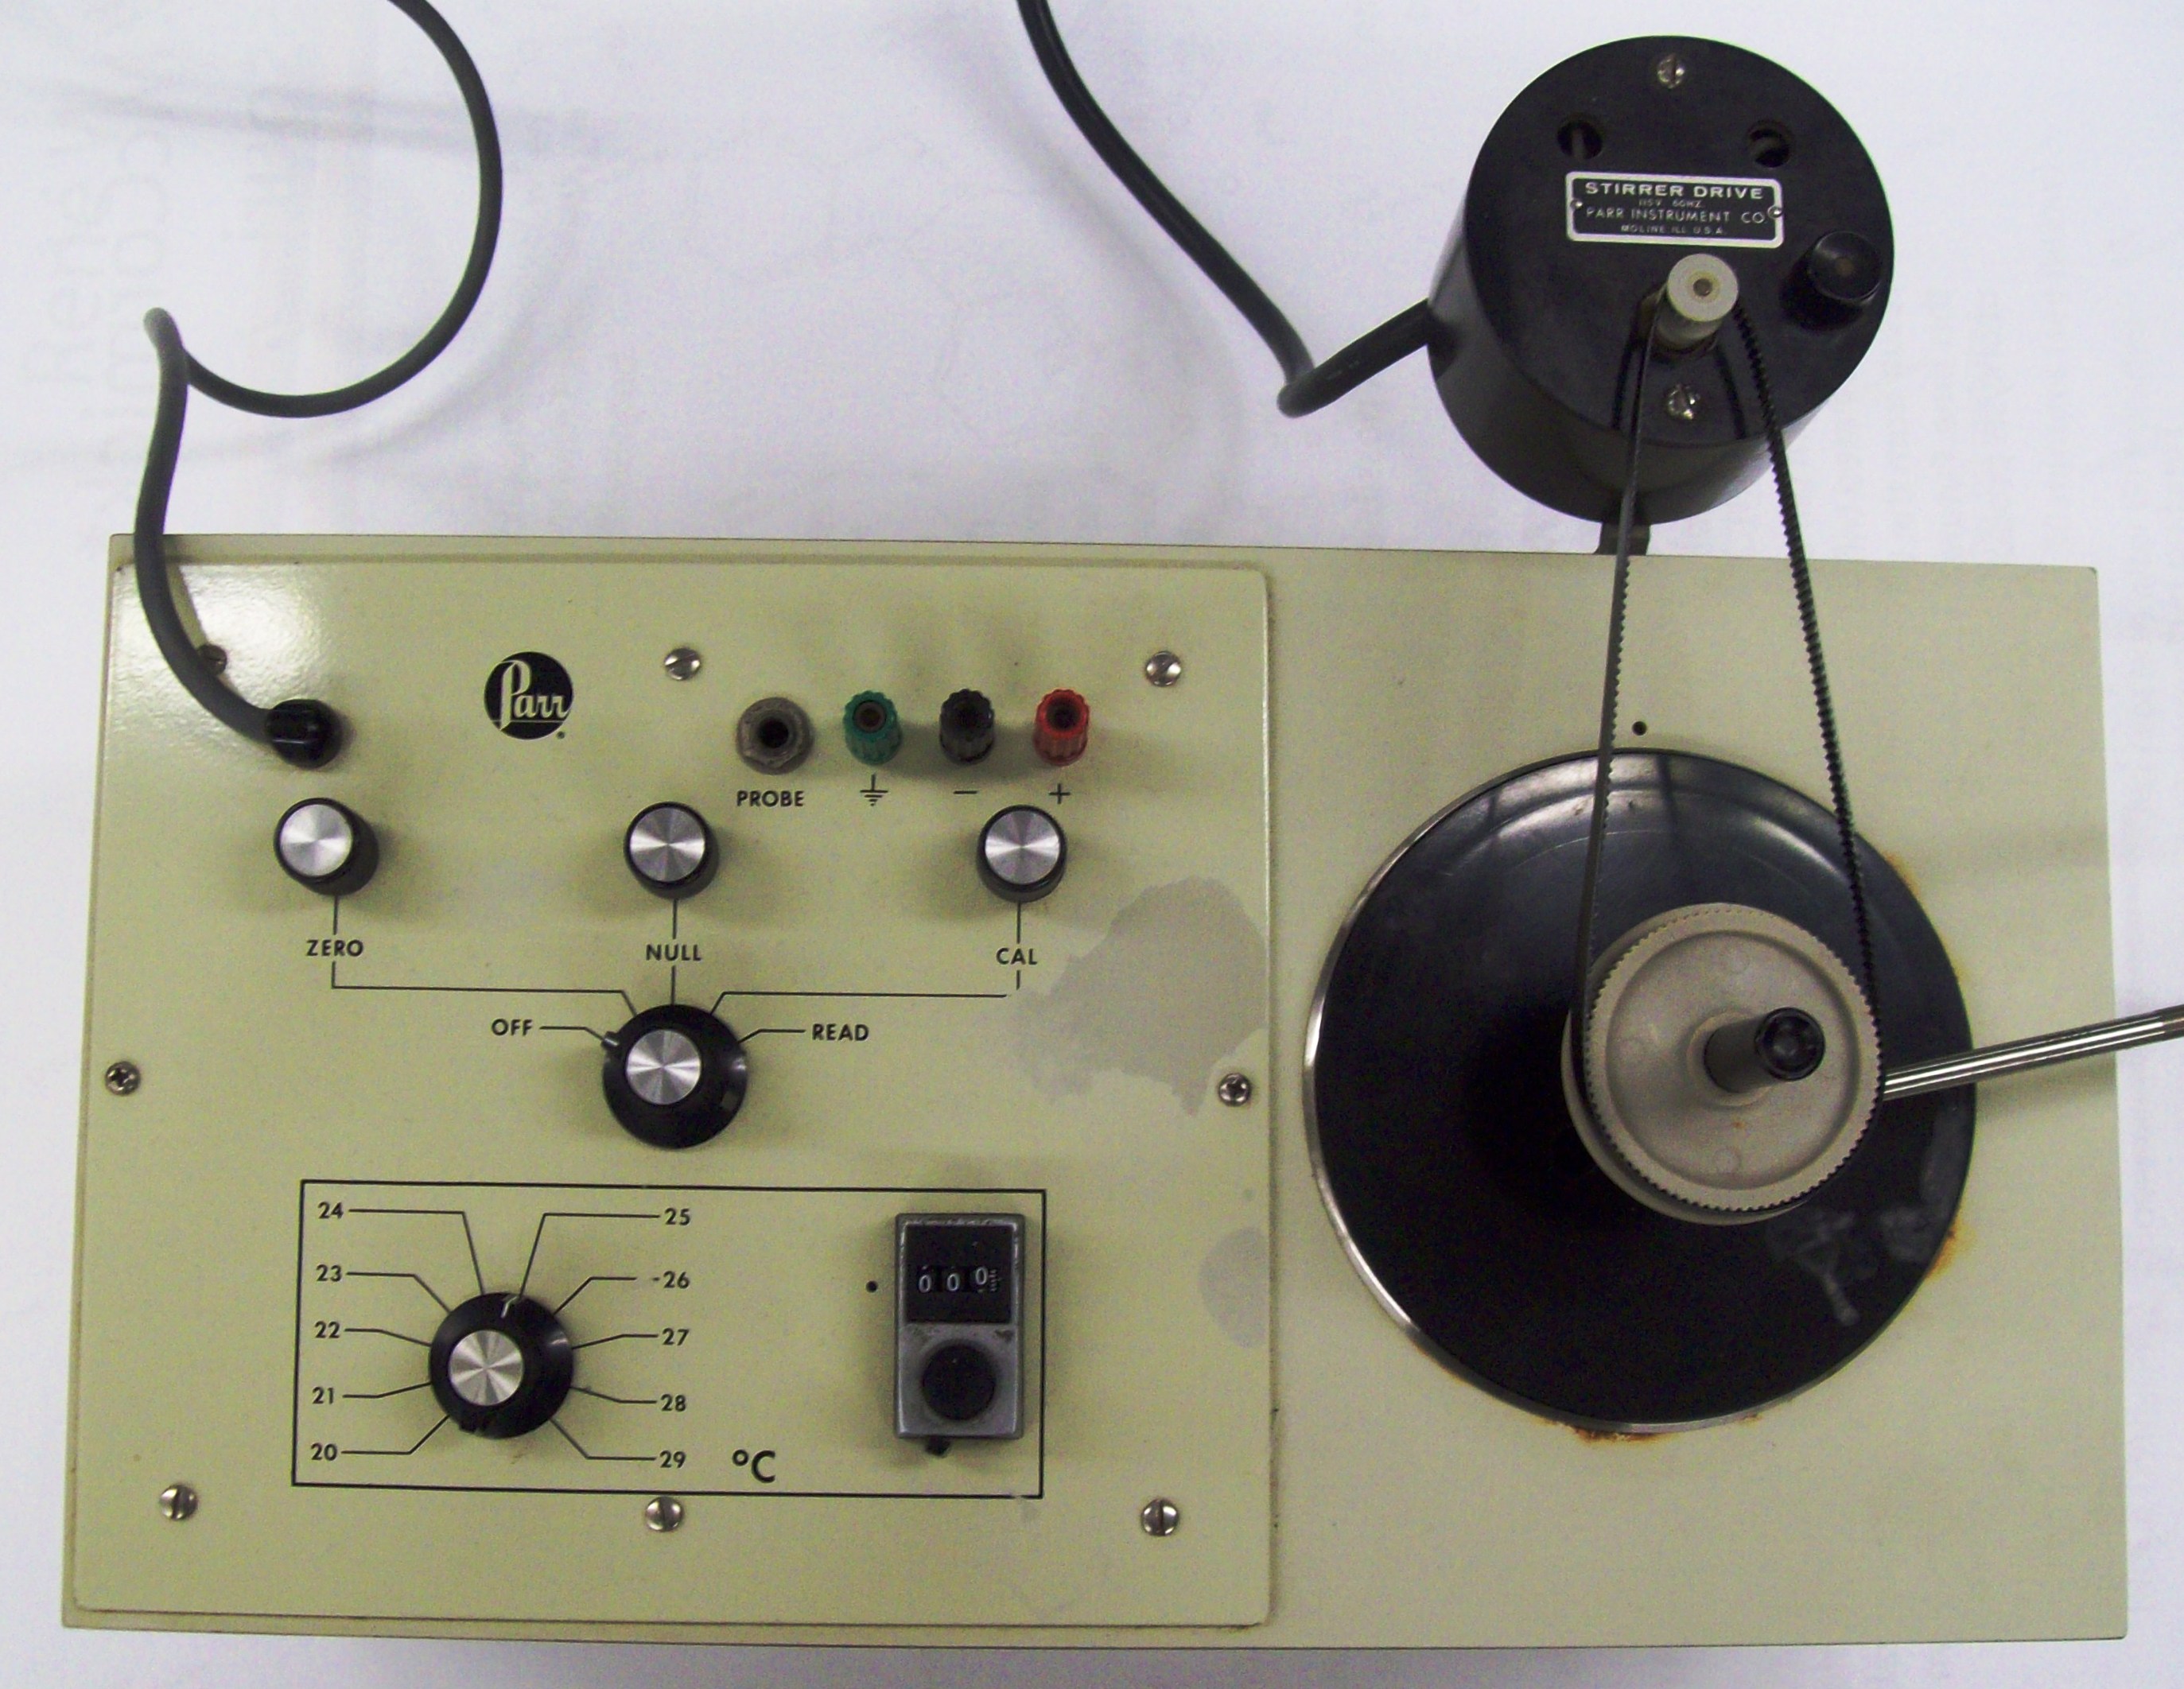 |
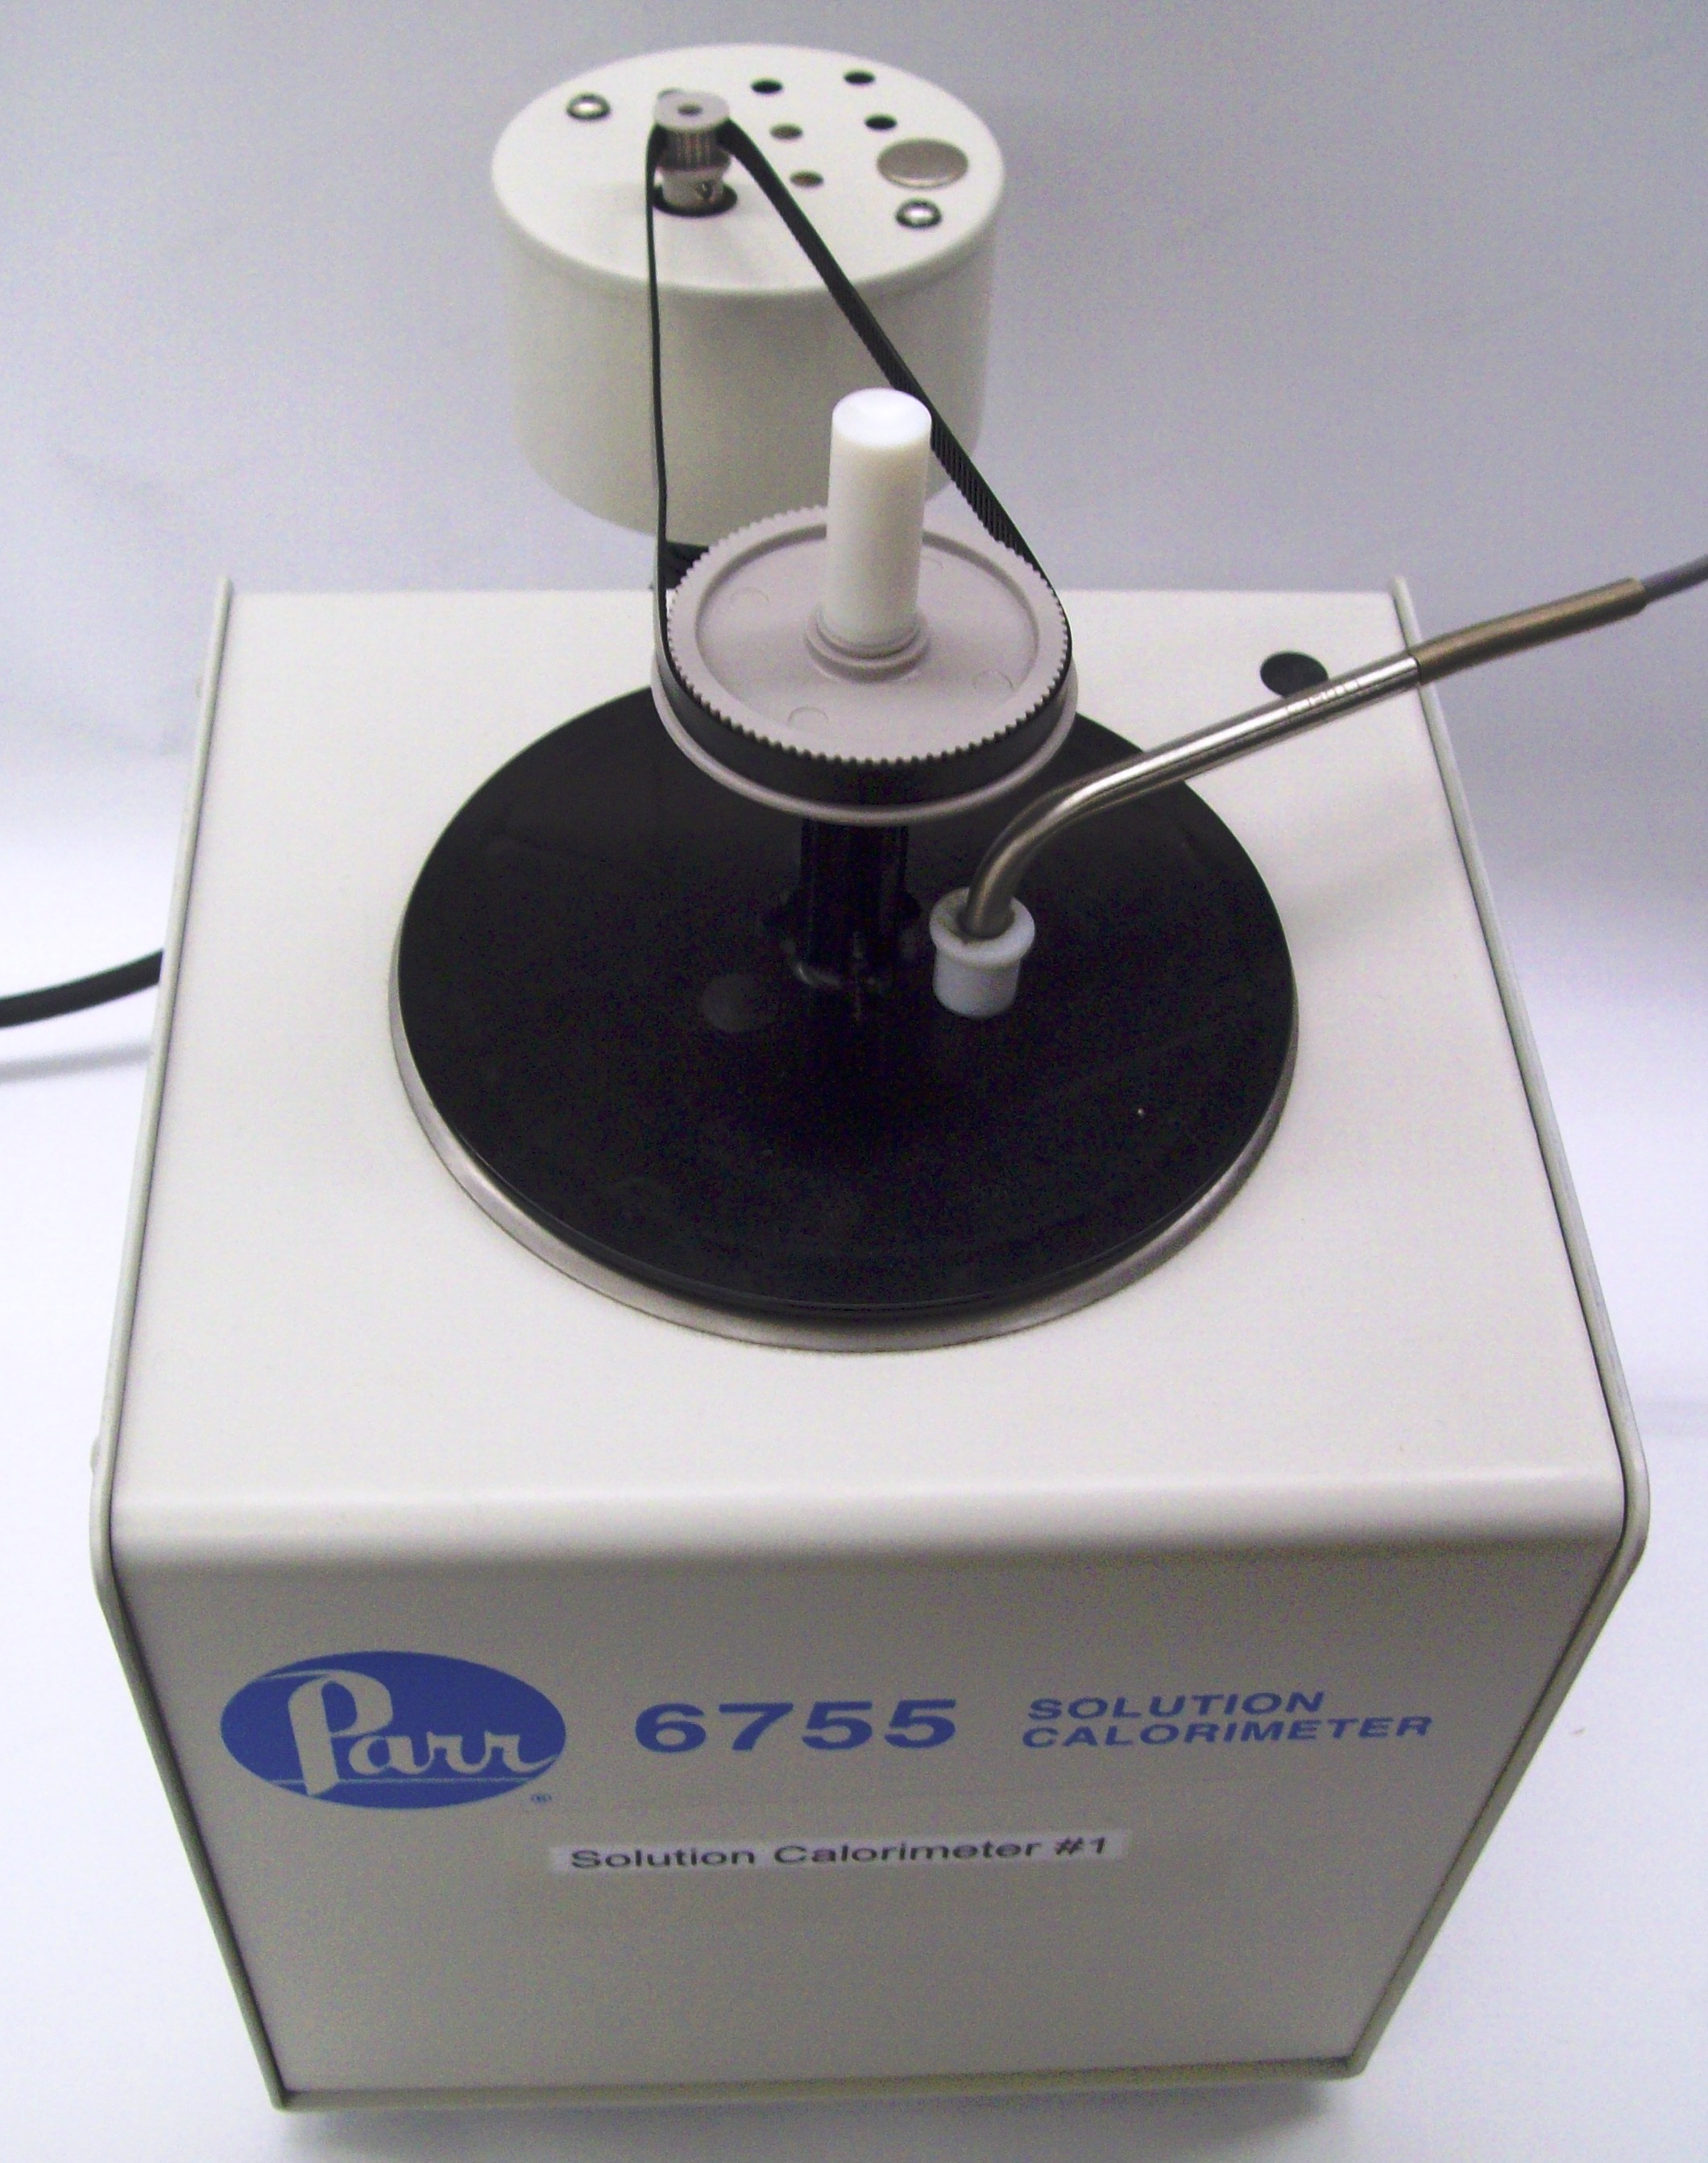 Figure 1. a) Parr model 1451 solution calorimeter (left), and b) Parr model 6775 solution calorimeter (right).
Despite their different appearances both calorimeters consist of a sample chamber, shown schematically in Fig. 2, which is surrounded by layers of insulation. Additional insulation is provided by the Dewar in which liquid part of the sample sits, the air jacket around the Dewar and the lid. Taken together the insulation provides a nearly adiabatic environment for the chemical reaction that takes place in the Dewar.
Figure 2. Cutaway schematic of the sample chamber of a Parr solution calorimeter.1
Operation
If you are using the model 1451 calorimeter, you only need to plug the power cable in (do not plug in the power cord for the integrated thermometer). The model 6755 power cable is to be attached the calorimetry thermometer by inserting the cord from the solution calorimeter into the plug on the back of the calorimetry thermometer labeled Motor (the plug fits in only one receptacle and fits in in only one way). IMPORTANT! The connection is made by inserting the plug and turning the ferrule until finger-tight. Do not over-tighten and do not attempt to pull the plug directly out of the socket without first completely loosening the ferrule. Before proceeding with the remainder of the calorimeter set-up, be sure plug the thermistor (also referred to as the temperature probe) into the calorimetry thermometer and set-up the thermometer to acquire data, as described in its operating instructions.
In preparation for a run, either a pure solvent (when a ΔsolutionH is to be measured) or solution containing one of the reactants (as when we attempt to measure ΔrxnH for a reaction taking place in solution) is placed in the Dewar. This is most conveniently done volumetrically, but it may also be done by weight. Be careful not to get solution or solvent on the outside of the Dewar and not to splash the Dewar’s contents on the inside of the calorimeter. The Dewar can now be left to equilibrate in the calorimeter while the sample is prepared.
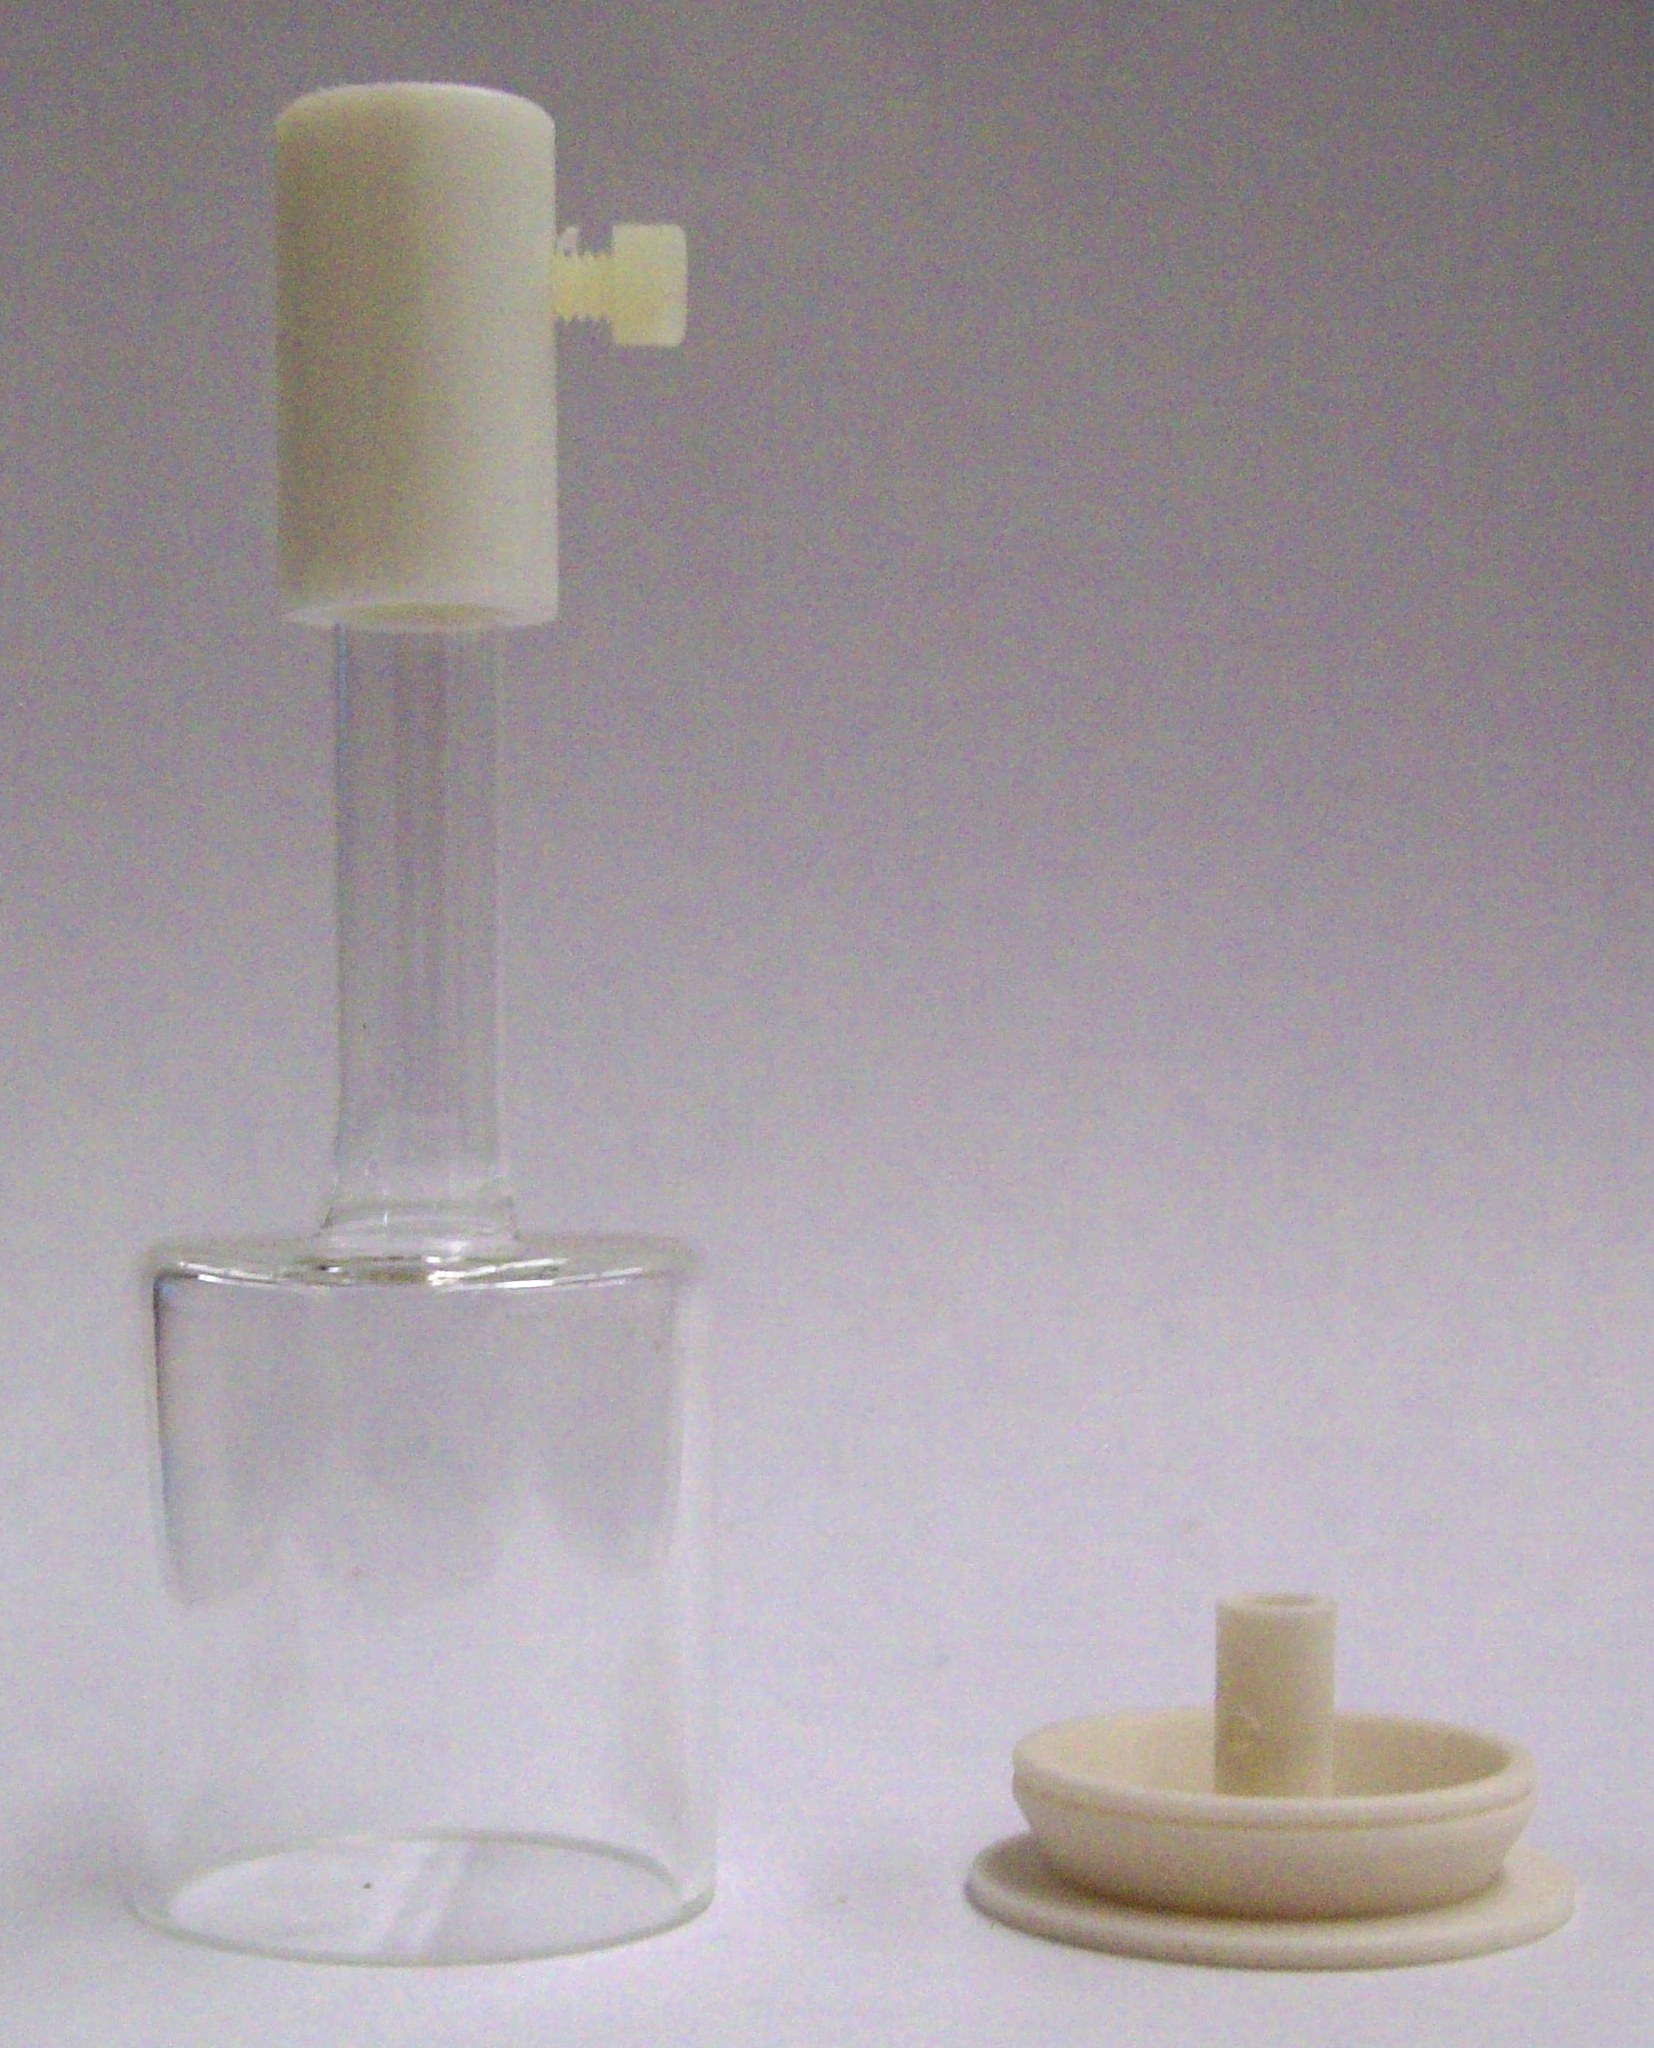 |
Figure 3. Sample bell, left, and Teflon dish, right.
The sample is contained in a bell-shaped tube attached to a removable Teflon dish, which makes a leak-tight seal with the bell tube. The separated sample bell and Teflon dish are shown in Fig. 3. The sample bell is very fragile, so handle it with care. When attaching or detaching the Teflon dish, handle the bell only by the large end. Be very careful not to damage the contact the edges of the Teflon dish.
To load a solid sample, remove the Teflon dish and weigh it on an analytical balance. Add the powdered sample to the dish and obtain its mass by difference. The sample must be powdered using a mortar and pestle to assure a sharp ΔT. Be sure that all of the sample is in the dish, and not on the contact edges or in the push rod socket in the center of the Teflon dish. Move the dish containing the sample to a clean, flat surface and carefully press the bell tube onto the dish.
To load a liquid sample, first connect the Teflon dish to the bell tube, as described above. Add the liquid to the cell through the top by pipet. The amount of material added may be measured either volumetrically or by weight, as with a solid sample.
Once the sample is in the cell, attach the cell to the stirring shaft on the calorimeter cover by carefully sliding the plastic coupling onto the shaft as far as it will go (see Fig. 2). Turn the thumb screw finger tight (Fig. 3) to finish the connection. Do not over-tighten this screw! Holding the cover, with the attached cell, in a horizontal position, lower it carefully until it rests on a clean, flat surface. Insert the glass push rod through the central pulley hub and lower it until it just rests on the Teflon dish’s socket. With a gentle twisting motion, press the end of the rod into the socket in the Teflon dish (see Fig. 2). It is not necessary to push the rod more than a millimeter, or so, into the socket. The push rod and sample bell are very fragile, exercise extreme care when performing this procedure.
Transfer the the entire assembly into the calorimeter containing the previously-filled Dewar. Carefully place the thermistor through one of the holes in the cover (it will snap in place). It is a good idea to position the thermistor opposite the stirring motor. After the samples have been loaded into the calorimeter, and the thermistor probe inserted, the drive belt is placed over the pulleys and the motor is switched on (rotary switch on the top of the drive motor for the model 1451, or via the calorimetry thermometer’s software for the model 6755).
Record the temperature to define the system’s pre-mixing behavior. The amount of time required to do this and the frequency at which the temperature is monitored will vary from reaction to reaction. However, acquiring data every 30 sec for about 5 min is a good starting point. The data acquisition frequency may be set using the thermometer’s software. If the reactants are not at room temperature, a slight but steady temperature change will be observed. While it is best that all reactants be at room temperature before mixing, a slight, consistent variation in temperature can be accounted for in the data analysis.
When a sufficient number of pre-mixing data points have been measured, place your index finger on the top of the push rod and your hand on the calorimeter’s lid. Use your other hand to stabilize the lid. If your hand is not large enough to reach, place it on top of the hand that is stabilizing the lid. Once you feel comfortable with your hand positions, quickly press down on the push rod with your index finger to release the dish, and hence the reagent in the rotating cell. This operation should be done swiftly, but not violently. During the brief time when pressure is applied to the push rod, the belt will slip. It is designed to do this! Although, it usually takes several runs for the operator to get used to this.
Note the time at which the addition was made and continue readings. The time required to completely characterize this post-mixing phase varies from reaction to reaction, but 5 min is usually sufficient to define the post-reaction behavior. After the reaction is complete, turn off the motor and remove the pulley. Remove the thermistor, rinse with distilled water and carefully pat dry with a Kimwipe. Place it out of harm’s way. Lift the calorimeter lid carefully. If the Teflon dish did not fall off the push rod during the run, gently push both the rod and the dish back into the bell, as you did to load a sample. Holding the bell firmly on a cushioned flat surface, gently remove the rod by pulling and twisting it out of the socket. Do not break the push rod. Remove the push rod and carefully remove the dish. Detach the bell tube. Rinse the bell tube and dish with distilled water, and dry with a Kimwipe or air dry. Remove the Dewar, empty the liquid, rinse with distilled water and wipe dry. Do not get water on the outside of the Dewar as it can become trapped between the Dewar and the inside of the calorimeter, which will eventually lead to deterioration of the calorimeter.
Clean-Up and Shut Down
Clean and dry the sample bell, the push rod and the Dewar, as described above. Return the sample bell, push rod, the drive belt and the pulley cam/stirring shaft assembly to the designated storage location. Unplug the calorimeter (from the power outlet for the model 1451 or from the calorimetry thermometer for the model 6772), store the cable and return the calorimeter to its storage location.
- 1. Parr Bulletin 1451, Solution Calorimeter; Parr Instrument Co.: Moline, IL, 1977.